Go Panel Preferences
Go Panel preferences can be found in the Blender Add-on Preferences. To access them, go to the Edit menu > Preferences.

Select Add-ons from the left-side menu (1, image below). Then search for ‘Go Panel’ in the search bar (2, image below).

Go Panel has been completely rewritten with a new preference system organized into four tabs: Interface, Tools, Custom Tray, and Brushes.

Interface Tab
The Interface tab contains settings for customizing the appearance and layout of the Go Panel.
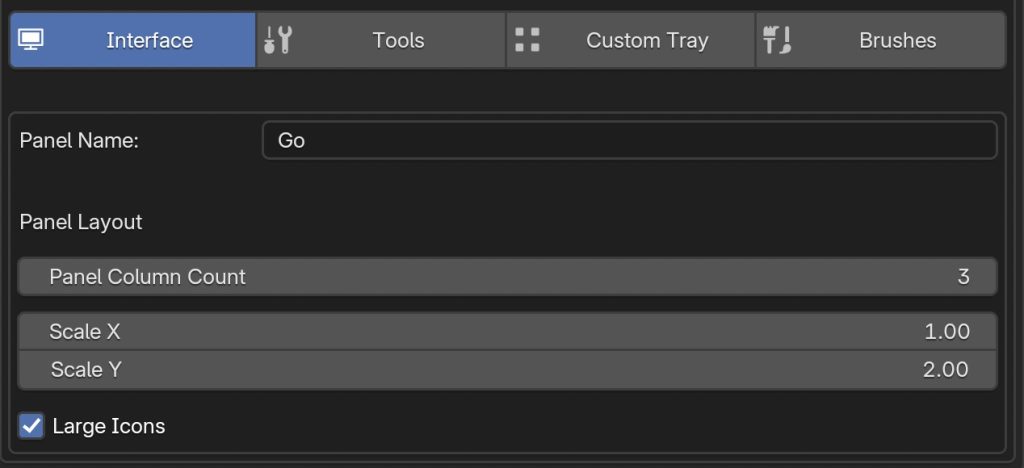
Panel Name
You can customize the name of the panel in the 3D View sidebar. By default, it’s called “Go” but you can change it to any name you prefer.
Panel Layout
The Panel Column Count slider controls how many columns of buttons appear in the Go Panel. Set it to 1 for a minimal single-column layout, or increase it up to 16 columns for a wider panel. Setting the value to 0 will use Blender’s automatic column layout.
The Scale X and Scale Y sliders adjust the horizontal and vertical size of the buttons in the panel. Increase these values to make buttons larger and easier to click, or decrease them for a more compact layout.
Text Labels
The Text Labels toggle controls the visibility of button names. Enable it to show text labels alongside icons, or disable it for a cleaner, icon-only look. This global setting affects all buttons in the panel including Tools, Brushes, and Custom Tray items.
Large Icons
Enable Large Icons to display larger tool icons in the Go Panel. This can make it easier to identify tools at a glance. Note: Due to Blender’s internal UI code, large icons may not be perfectly centered. If you prefer pixel-perfect centering, keep this option disabled to use standard smaller icons.
Mode Labels

By default, the different modes are labeled in the user interface. To disable the labels in the Go Panel, you can uncheck the Mode Labels toggle in the Interface tab.
Tools Tab
The Tools tab allows you to customize which tools appear in the Go Panel for each object type and mode.
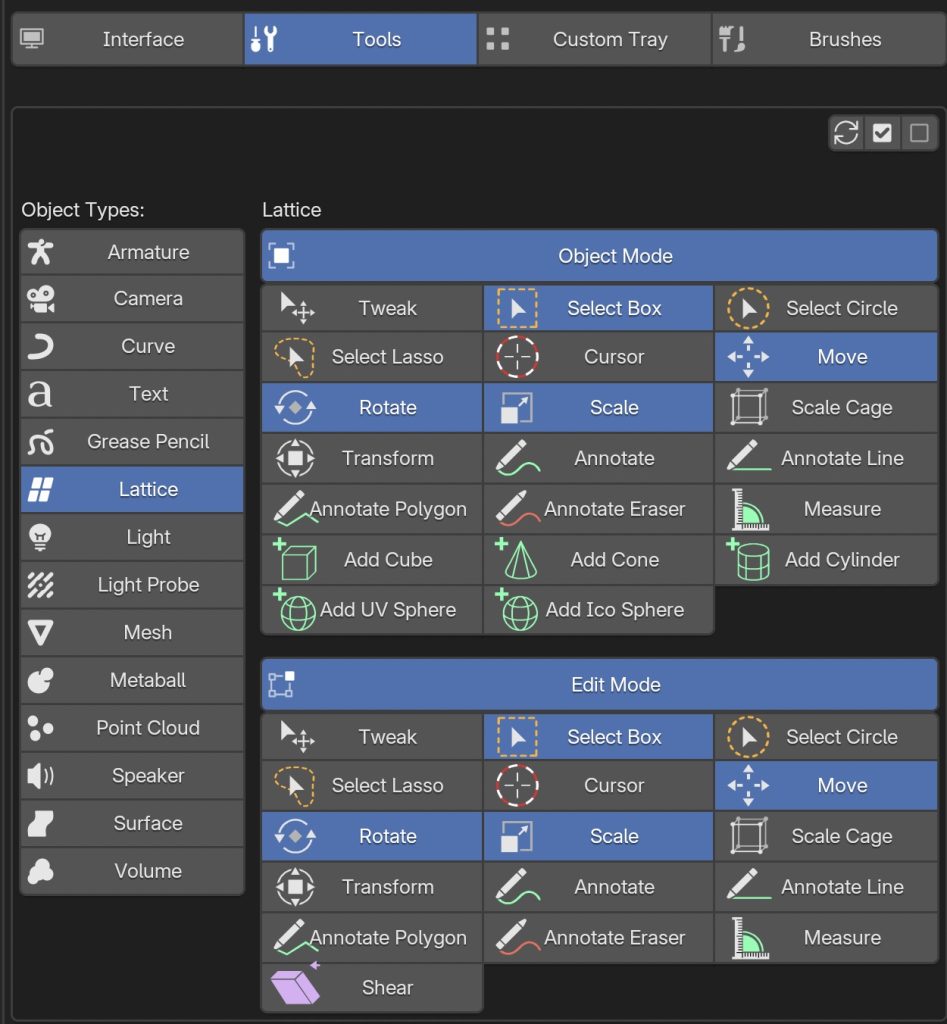
Tool Visibility Controls
At the top of the Tools tab, you’ll find three buttons for quickly managing tool visibility:
- Reset to Defaults – Restores the default selection of tools for each mode
- Activate All – Shows all available tools in the Go Panel
- Deactivate All – Hides all tools (useful for starting with a clean slate)
Customizing Tools by Object Type and Mode
To customize which tools appear in the Go Panel:
- Select an Object Type from the left column (e.g., Mesh, Grease Pencil, Curve)
- On the right side, you’ll see all available modes for that object type
- Click a mode name to expand or collapse its tool list
- Toggle individual tools on/off using the checkboxes
Not all objects have special modes – all objects have an Object Mode, but only certain object types (Armature, Curve, Mesh, Grease Pencil, etc.) have additional modes like Edit, Sculpt, or Paint modes.
Custom Tray Tab
The Custom Tray tab is a powerful new feature in Go Panel v2.0 that allows you to add buttons for any Blender operator, including operators from other add-ons and extensions.
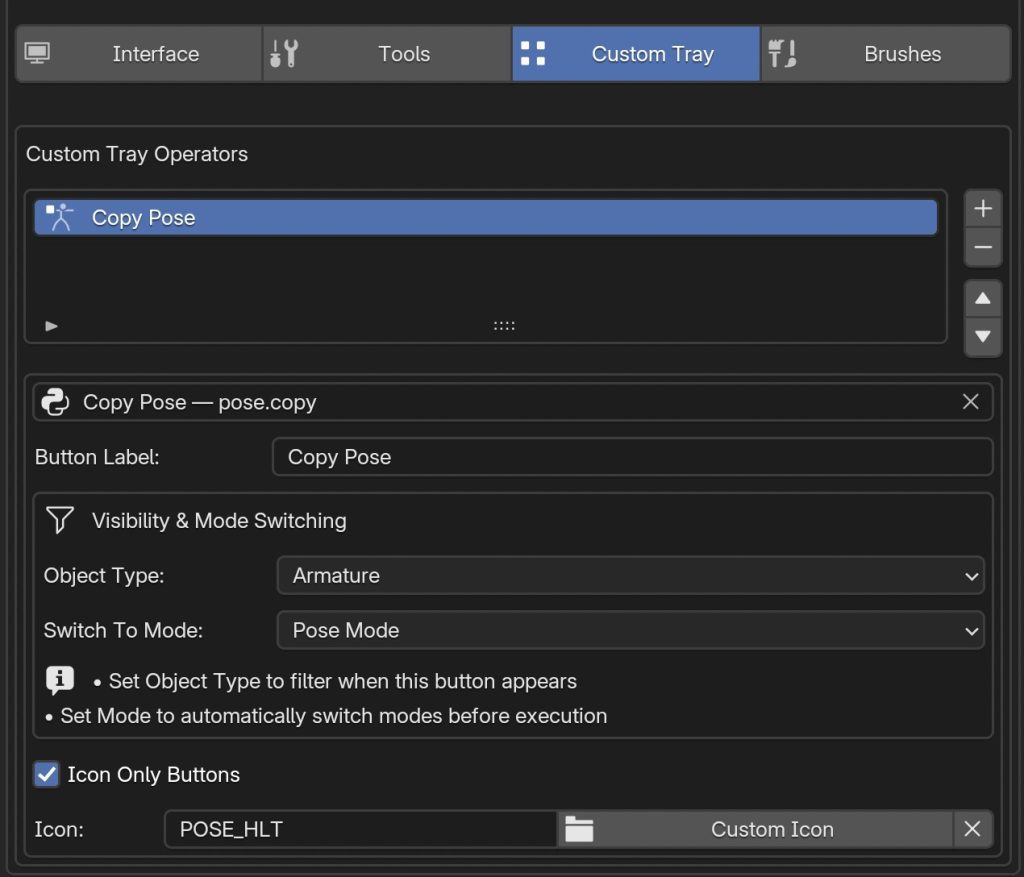
Adding Custom Operators
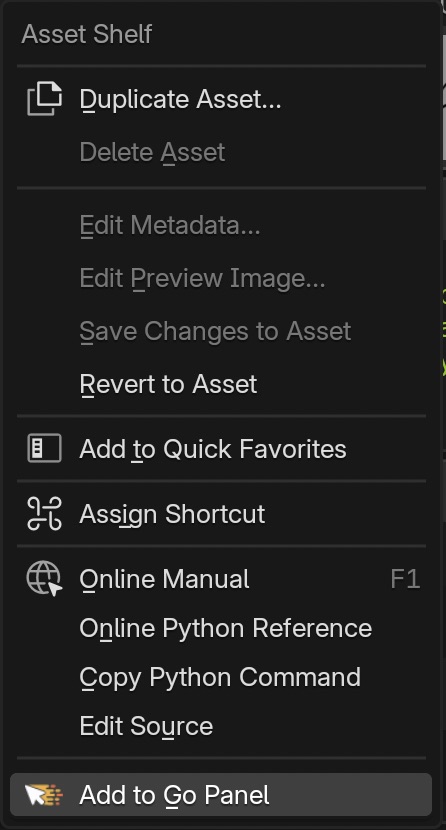
There are two ways to add custom operators:
- From the Preferences: In the Custom Tray tab, click the “+” button to manually add an operator by entering its operator ID (e.g.,
pose.copy) - From Context Menus: Right-click any menu command in Blender and select “Add to Go Panel” to instantly add it to your Custom Tray
Customizing Custom Operators
For each custom operator, you can configure:
- Button Label: The text displayed on the button
- Icon: Choose from Blender’s built-in icons or use a custom icon
- Icon Only Buttons: Display only the icon without text to save space
- Object Type Filter: Show the button only when a specific object type is selected
- Mode Switching: Automatically switch to a specific mode before executing the operator
Brushes Tab
The Brushes tab allows you to add brush assets from Blender’s Asset Browser directly to the Go Panel. This replaces the old cache-based system with a simpler, more efficient workflow.
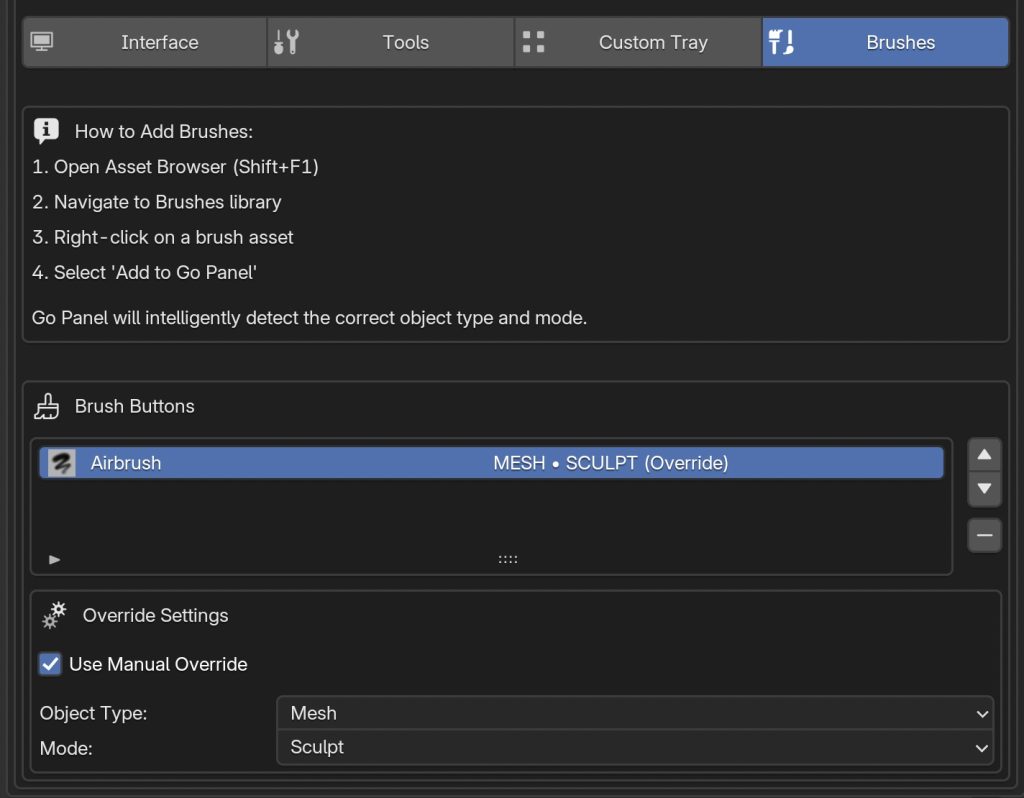
How to Add Brushes
To add a brush to the Go Panel:
- Open the Asset Browser (Shift+F1)
- Navigate to a Brushes library (Essentials or your custom library)
- Right-click on a brush asset
- Select “Add to Go Panel”
Go Panel will intelligently detect the correct object type and mode for the brush. When a brush is added, the add-on activates the asset to load the brush into Blender’s data, making its preview thumbnail available for the current session.
Brush Thumbnails
Brush thumbnails are displayed dynamically in both the Preferences and the Go Panel during your current Blender session. The thumbnails are loaded from Blender’s asset system when the brush is activated. If a preview isn’t available, a default brush icon is shown instead.
Note: Unlike the previous version, Go Panel v2.0 does not build persistent thumbnail caches. Previews are session-only and loaded on demand, which eliminates long startup times and cache management.
Managing Brushes
In the Brushes tab, you can:
- Reorder brushes: Use the up/down arrows to change the order they appear in the Go Panel
- Remove brushes: Click the minus (-) button or right-click the brush button in the Go Panel and select “Remove from Go Panel Tools”
- Override detection: If Go Panel incorrectly detects the object type or mode, enable “Use Manual Override” and set the correct values